In this tutorial we will learn file Upload and File progress. Image upload or file upload is a common requirement of the application.
Before start learning file upload, We need a Angular 7 Project. If you don’t know how to create a new project. Follow Angular 7 installation guide tutorial.
So let’s get started
Create template
First we need to create template. In this template we will create file input element that allows to us to choose the file and a button to submit the form. To create it open the app.component.html file and put the below html on it. Instead of app.component.html you can put on another component too!
<div class="container">
<div class="row">
<div class="col-md-6 offset-md-3">
<h3>Choose File</h3>
<form (ngSubmit)="onSubmit()">
<div class="form-group">
<input type="file" name="image" />
</div>
<div class="form-group">
<button class="btn btn-primary">Submit</button>
</div>
</form>
</div>
</div>
</div>
Configure the HttpClientModule
We will use the Angular 7 HttpClient to upload the file on the server.
So before writing file upload code, first, Open src/app/app.module.ts then add this import.
import { HttpClientModule } from '@angular/common/http';
Add HttpClientModule to imports array under @NgModule
imports: [
HttpClientModule
]
Now open the app.component.ts file and put the below code on it
fileData: File = null;
constructor(private http: HttpClient) { }
fileProgress(fileInput: any) {
this.fileData = <File>fileInput.target.files[0];
}
onSubmit() {
const formData = new FormData();
formData.append('file', this.fileData);
this.http.post('url/to/your/api', formData)
.subscribe(res => {
console.log(res);
alert('SUCCESS !!');
})
}
Here you can see the two methods onSubmit and fileProgress. The fileProgress method will called when the user choose file. It will get the file object of selected file and store in the fileData.
The onSubmit function will called when the form submit. Here we have created a formData object. We will store the file object to the formData and then upload it to the server via Angular 7 HttpClient
After the changes our app.component.ts file will looks like this
import { Component } from '@angular/core';
import { HttpClient } from '@angular/common/http';
@Component({
selector: 'app-root',
templateUrl: './app.component.html',
styleUrls: ['./app.component.css']
})
export class AppComponent {
title = 'helloworld';
fileData = null;
constructor(private http: HttpClient) { }
ngOnInit() {
}
fileProgress(fileInput: any) {
this.fileData = <File>fileInput.target.files[0];
}
onSubmit() {
const formData = new FormData();
formData.append('file', this.fileData);
this.http.post('url/to/your/api', formData)
.subscribe(res => {
console.log(res);
alert('SUCCESS !!');
})
}
}
Now you can upload the file, But in some case you need more control
Progress Event
If you are dealing with the big file or You may want to show progress to user, Angular 7 httpClient gives you the progress status.
First of all open the app.component.ts file and put the below import
import { HttpClient, HttpEventType } from '@angular/common/http';
Then you just need to add reportProgress to true and set the observe to events in the config like we have below. You will get all the events on subscribe
this.http.post('url/to/your/api', formData, {
reportProgress: true,
observe: 'events'
})
.subscribe(events => {
if(events.type == HttpEventType.UploadProgress) {
console.log('Upload progress: ', Math.round(events.loaded / events.total * 100) + '%');
} else if(events.type === HttpEventType.Response) {
console.log(events);
}
})
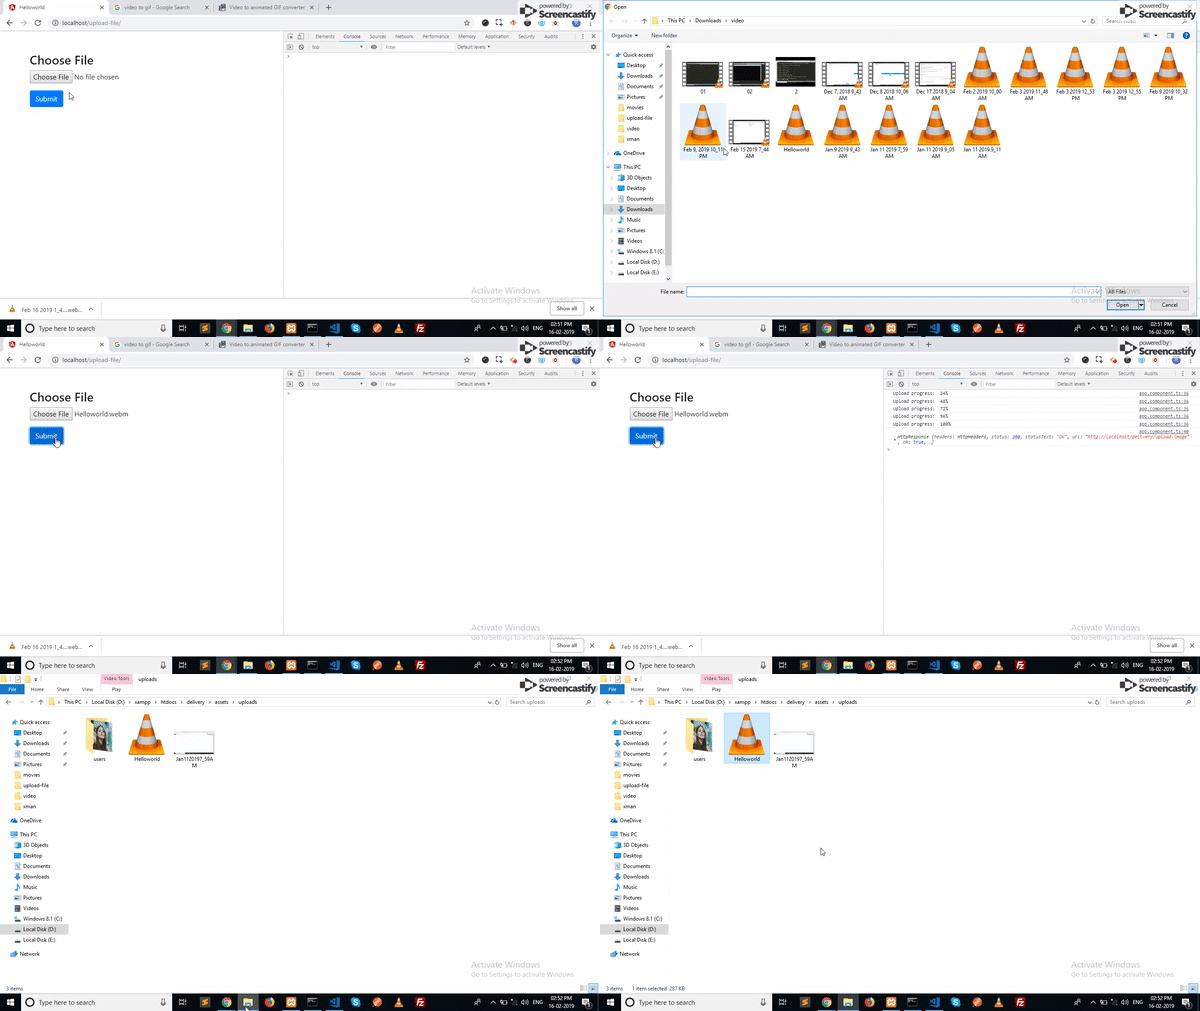
Here is the working demo


