Laravel 7, 6 socialite google gmail account login example tutorial. Here you will learn how to implement socialite google gmail account login in laravel app using laravel socialite package.
Sometimes, you need to add social login (google, github, facebook, twitter) button in your laravel app for easy login purpose.
This tutorial also provide you live demo of laravel socialite google login app. You can click here “Demo“.
So, This laravel socialite google login example tutorial will help you step by step on how to implement socialite google login in laravel app.
Laravel Socialite Google Login Example
Follow the below and implement socialite google gmail account login in laravel app:
- Install laravel App
- Add Database Details
- Install Socialite Package For Google Login
- Create Google App
- Set Google App Details
- Add Routes
- Generate Auth Files By Artisan
- Create Controller
- Add Socialite Google Login Button In Blade Views
- Run Development Server
Step1: Install laravel App
First of all, Download or install laravel fresh app for your laravel socialite google gmail account login app. So use the following command to download laravel fresh app:
composer create-project --prefer-dist laravel/laravel blog
Step 2: Add Database Details
In this step, you need to add database details in .env file. So navigate to project root directory and find .env file. And add your database details into .env file as follow:
 DB_CONNECTION=mysql
 DB_HOST=127.0.0.1
 DB_PORT=3306
 DB_DATABASE=here your database name here
 DB_USERNAME=here database username here
 DB_PASSWORD=here database password here
Step 3: Install Socialite Package For Google Login
In this step, you need to run the following command to install laravel socialite package for google login:
composer require laravel/socialite
Now, Navigate to config directory and open app.php file. Then add aliese and provider app.php:
'providers' => [
     // Other service providers…
 Laravel\Socialite\SocialiteServiceProvider::class,
],

'aliases' => [
// Other aliases…
'Socialite' => Laravel\Socialite\Facades\Socialite::class,
],
Step 4: Create Google App
In this step, you need to create google app for get CLIENT ID and CLIENT SECRET to add a social google login button in the laravel based project.
If you do not have google client id and client secret for your laravel google login app. So you need to create google app for get client id and client secret for your laravel socialite google login. So you can follow the below steps and create google app:
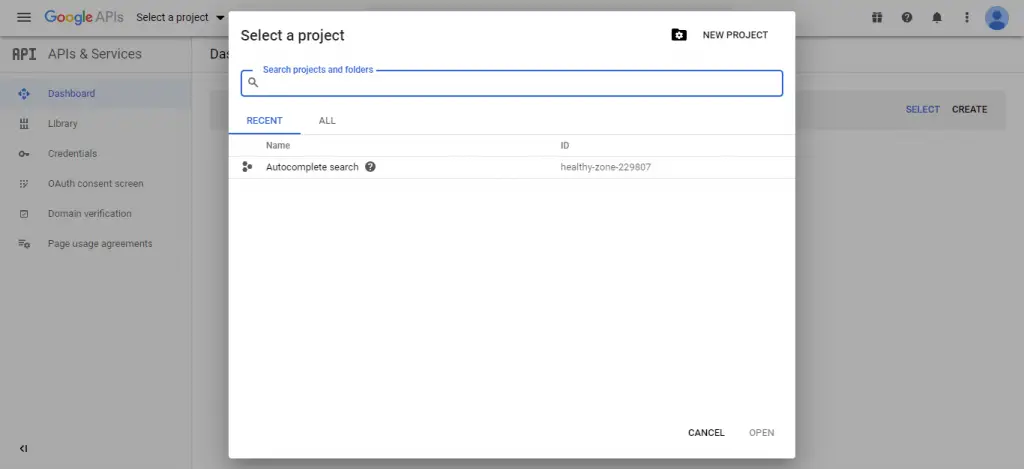
Step 1: Visit Google Developer Console. And create a new project as following in below picture:
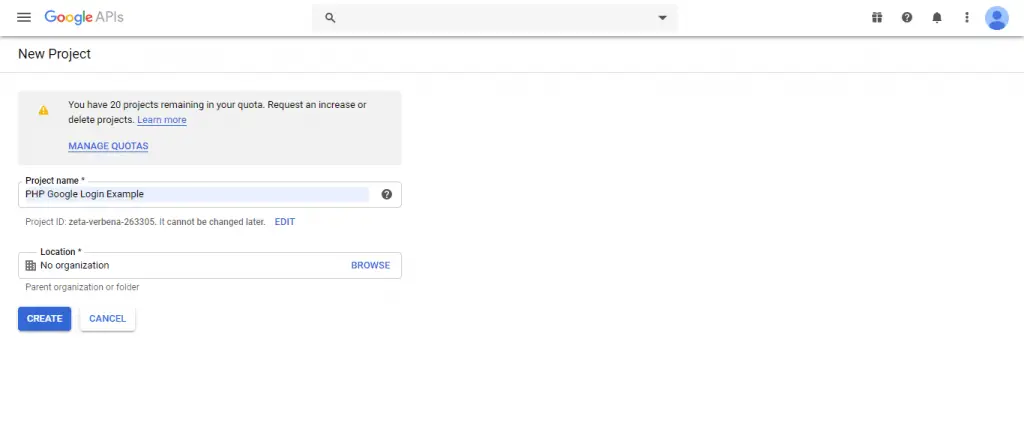
Step 2: you will see the screen looks like, show here you can set your project name as you want.
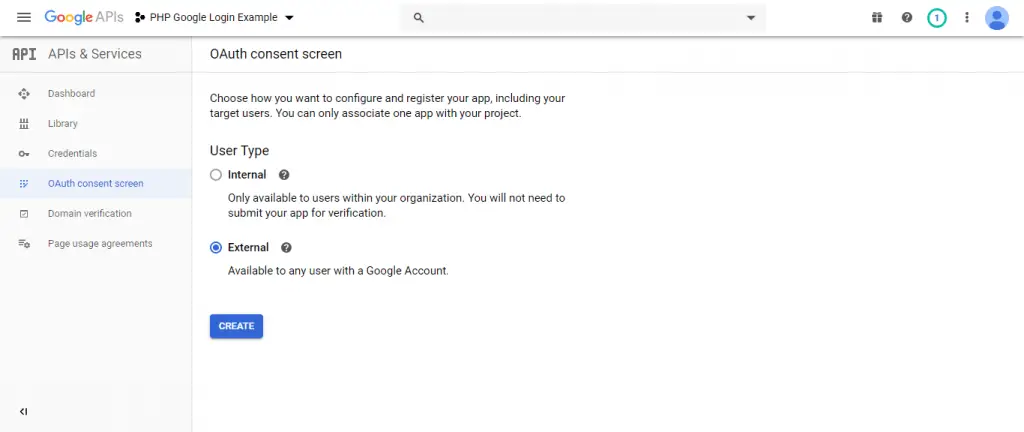
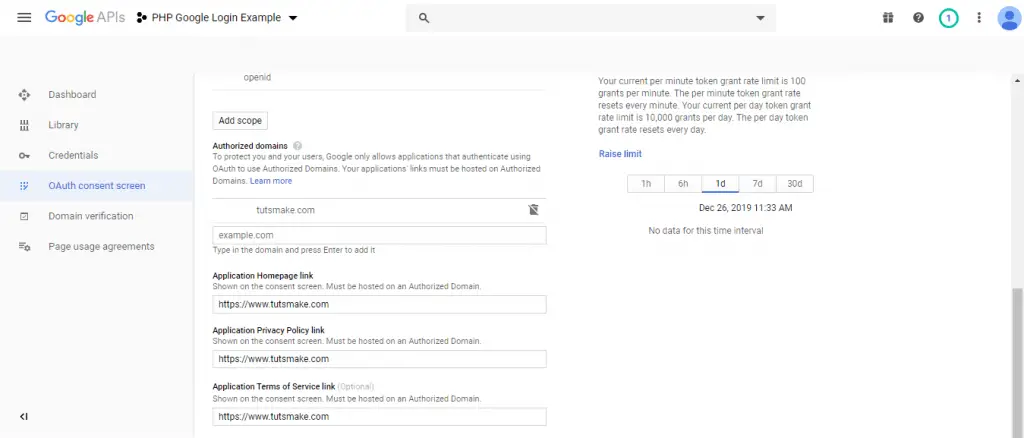
Step 3: Now you have successfully created a new project. After that, you need to select the created projects on the top menu. Then click on OAuth consent screen and select the given option according to your requirement:
Step 4: when you will be done above. After that automatically appear below given screen. In this screen, you need to fill your website URL, privacy policy URL, etc.
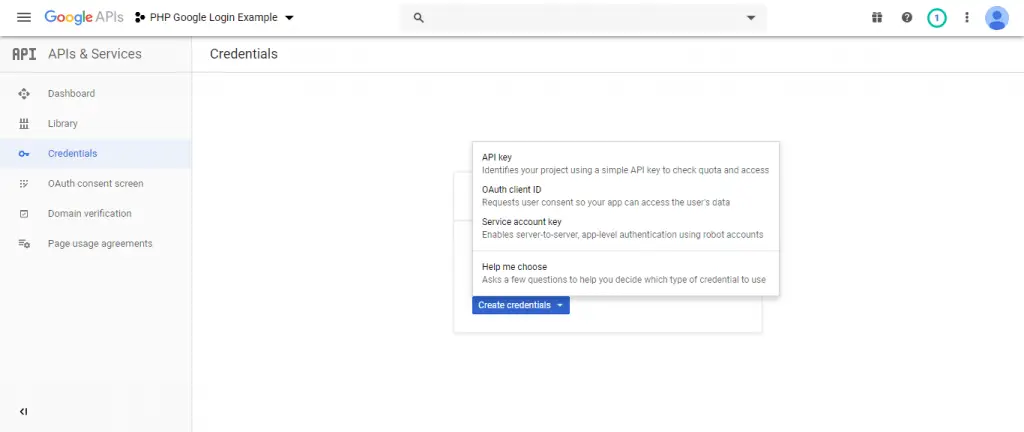
Step 5: you need to click on left side menu credentials and appear below screen. In this screen, you need to select OAuth client ID.
Step 6: After that, the below form will be apper. Here From different Application type options, you have to select Web application. Once you have select Web application option, then one form will appear on web page. Here you have to define Name and you have also define Authorized redirect URIs field and lastly click on Create button.

Step 7: the pop looks like below in picture automatically appear. Once you have click on the create button, then you can get your Client ID and your client secret key. You have to copy both key for future use for implement Login using Google account using PHP.

Step 5: Add Google App Details
Now, add google app details with redirect url.
So, navigate to the config directory and open service.php file. And add the google client id, secret and redirect url in service.php file:
 'google' => [
    'client_id' => 'xxxx',
    'client_secret' => 'xxx',
    'redirect' => 'http://127.0.0.1:8000/callback/google',
  ],
After that, open User.php model and add the following properties into User.php model file:
protected $fillable = [
         'name', 'email', 'password', 'provider', 'provider_id'
     ];
Now, Navigate to app/database folder and open create_users_table.php. And add the following code into your create_users_table.php file:
public function up()
{
Schema::create('users', function (Blueprint $table) {
$table->increments('id');
$table->string('name');
$table->string('email')->unique()->nullable();
$table->string('provider');
$table->string('provider_id');
$table->timestamp('email_verified_at')->nullable();
$table->string('password')->nullable();
$table->rememberToken()->nullable();
$table->timestamps();
});
}
Before you run PHP artisan migrate command, Navigate to go to app/providers folder and open AppServiceProvider.php file. And add the following code into your AppServiceProvider.php file:
...
use Illuminate\Support\Facades\Schema;

....
function boot()
{
    Schema::defaultStringLength(191);
}
...
Next, migrate the table using the below command :
php artisan migrate
Step 6: Generate Auth File By Artisan
In this step, you need to run the following commands to create or generate auth files:
Install Laravel UI
composer require laravel/ui
Create Auth
php artisan ui bootstrap --auth
NPM Install
npm install
Step 7: Add Routes
Now, you need to add routes in the web.php file. So navigate to routes folder and open web.php file. Then add the following routes into web.php file:
 Route::get('/auth/redirect/{provider}', 'GoogleLoginController@redirect');
 Route::get('/callback/{provider}', 'GoogleLoginController@callback');
Step 8: Create Controller
In this step, you need to run the following command to create a controller name SocialController.php. So run the following command on cmd
php artisan make:controller GoogleLoginController.php
Then navigate to app/controllers folder and open GoogleLoginController.php. And add the following code into your GoogleLoginController.php file:
<?php
namespace App\Http\Controllers;
use Illuminate\Http\Request;
use Validator,Redirect,Response,File;
use Socialite;
use App\User;
class GoogleLoginController extends Controller
{
public function redirect($provider)
{
return Socialite::driver($provider)->redirect();
}
public function callback($provider)
{
$getInfo = Socialite::driver($provider)->user();
$user = $this->createUser($getInfo,$provider);
auth()->login($user);
return redirect()->to('/home');
}
function createUser($getInfo,$provider){
$user = User::where('provider_id', $getInfo->id)->first();
if (!$user) {
$user = User::create([
'name' => $getInfo->name,
'email' => $getInfo->email,
'provider' => $provider,
'provider_id' => $getInfo->id
]);
}
return $user;
}
}
Step 9: Add Socialite Google Login Button In Blade Views
In this step, you need to add socialite google login buttons in blade views file.
So, Navigate to Resources/Views/Auth folder and open register.blade.php. Then add a laravel socialite google login button in register.blade.php file:
<hr>
<div class="form-group row mb-0">
<div class="col-md-8 offset-md-4">
<a href="{{ url('/auth/redirect/google') }}" class="btn btn-primary"><i class="fa fa-google"></i> Google</a>
</div>
</div>
Next, Navigate to Resources/Views/Auth folder and open login.blade.php. Then add a laravel socialite google login button in login.blade.php file:
<hr>
<div class="form-group row mb-0">
<div class="col-md-8 offset-md-4">
<a href="{{ url('/auth/redirect/google') }}" class="btn btn-primary"><i class="fa fa-google"></i> Google</a>
</div>
</div>
Step 10: Run Development Server
Finally, run the following command to start the development server:
php artisan serve
Now you are ready to run your laravel socialite google login app. So open your browser and hit the following urls:
 http://127.0.0.1:8000/login

 Or direct hit in your browser

 http://localhost/blog/public/login
Conclusion
In this laravel socialite login example tutorial from scratch, You have learned how to implement google login in laravel using socialite package.