In this tutorial, we are going to guide you through the entire process of creating a 3 node InnoDB cluster in Oracle Public Cloud (OPC). We will address each of the steps, from the initial configuration and setup of the OPC IaaS resources to the InnoDB cluster creation and setup.
Setting up Three MySQL Instances on OPC
Before we can get started, we have to create three MySQL instances on OPC.
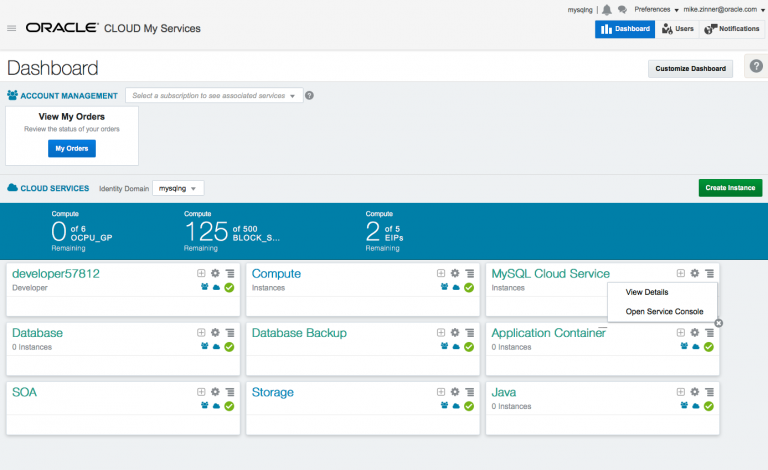
Log into the Oracle Cloud Dashboard and open the MySQL Cloud Service Console.
On the Oracle MySQL Cloud Service Console press [Create Service] to add a new MySQL Instance. For this tutorial, we will use 3 MySQL instances with the respective names of ic01, ic02, ic03. Enter a Service Description and click [Next >].

On the next screen, we select the virtual machine type–which will run Oracle Linux 6 as the OS–provide our SSH Public Key–so that we’re able to access the machine later on–and we specify some basic MySQL configuration details.
Note: For this tutorial we will use root as Administrator User. Please ensure to use the same Administration Password on all 3 instances.

It will take a few minutes to create the virtual machine. We can use that time to start creating the other two MySQL service instances as well.

After the MySQL service instance is available, we can click the instance name–ic01–to get more information about the MySQL instance. Please make sure to note the Public IP address as we will need to update the local hosts file with this information.

In this case, the MySQL service instance is running on 140.86.13.239. Repeat this for all instances and then update your local /etc/hosts file. Open the file with your editor of choice–I’ll use nano:
And add entries for all three of your MySQL service instances, specifying their hostnames and IP addresses:
After this has been completed, we can update the Access Rules to allow the MySQL instances to talk to each other within the OPC network and enable public access to the machines (if desired). Click the context menu and select [Access Rules].

On the Access Rules screen click [Create Rule] to bring up the Create Access Rule dialog.

Create three new rules and enable public access to the machines:
Create Access Rule #1
Rule name: local_mysql_ic_access
Description: Allow local InnoDB cluster communication
Source: <custom> 10.196.0.0/16
Destination: mysql_MASTER
Destination Port(s): 3306, 13306
Create Access Rule #2
Rule name: local_mysql_ic_access2
Description: Allow local InnoDB cluster communication
Source: <custom> 10.196.0.0/16
Destination: mysql_MASTER
Destination Port(s): 13306
Create Access Rule #3
Rule name: mysql_p2admin_x
Description: Permit public access to MySQL X Protocol Port
Source: PUBLIC-INTERNET
Destination: mysql_MASTER
Destination Port(s): 33060
Enable Access Rule for public 3306 access
Rule Name: ora_p2admin_mysql
After these steps, you have three instances that are ready to be prepared for InnoDB cluster usage from an SSH session.
Preparing the MySQL Service Instances for InnoDB Cluster Usage
In the previous section, we created the MySQL Cloud Service instances within OPC and uploaded our public SSH key. We also added the OPC instance names to our local hosts file so we can access them by (short) name instead of IP. Now we can access our MySQL service instances in OPC via SSH on our local machine.
Open a terminal and type the following to connect to the first instance:
If everything is configured correctly you will see the following welcome message:

Installing Python 2.7
Since Python is required by MySQL Shell, it needs to be installed before continuing. In this case, Python is going to be installed using the Software Collection Library 2.3 for Oracle Linux. Use the following command to download the yum repository file that includes an entry for the Software Collections repository:

An easy way to enable repositories is to use the yum-utils package, which is used in this tutorial. Since it’s not installed by default, I will install it with the following command:
Once the installation of yum-utils package finishes, enable the Software Collection repository:
To continue, install the Software Collection Library Utility and Python 2.7:
Now, enable the use of Python 2.7:
Installing the MySQL Shell
To install MySQL Shell first we need to install the official MySQL yum repository. Run the following command to install the yum repository:
Type the following command in the terminal to install MySQL Shell:
Preparing the MySQL Instances for InnoDB Cluster Usage
First, we need to switch to the “oracle” user and then start MySQL Shell specifying that Python 2.7 should be enabled for it:

We switch to the “oracle” user because the MySQL Service (mysqld) is only exposed to the “oracle” user, and it is not in the PATH for the “opc” user.
Since the OPC MySQL service instance uses the Password Validation Plugin, and its default could potentially be too strict for the auto-generated Router bootstrap password, we will avoid possible issues by lowering the password policy a level with the following on each instance using MySQL Shell:
Next, we configure the local instance by calling the following function, typing the password for root user when prompted:
The MySQL configuration file (my.cnf) needs to be specified and is found in /u01/bin/mysql/my.cnf. If you used a different Administrative User other than “root”, MySQL Shell gives you the option to create a new Administrative User for the InnoDB cluster when you are configuring the host using dba.configureLocalInstance(), but since we were using “root” for this tutorial, no new user needs to be created.
Then you will see a report with the changes made by MySQL Shell and a message saying that you need to restart the MySQL service instance to apply them:

To restart the MySQL server, first quit the MySQL Shell:
Then run the following command using the “oracle” user to stop the MySQL Server instance:
Then, start the MySQL server again: